
If you have a Blog or Website, you also have a contact us to connect reader to the admin of Blog or Website. In this tutorial i would like to share a simple step to create a contact to the admin of site;

Here the procedure to create a Contact us in your Page.

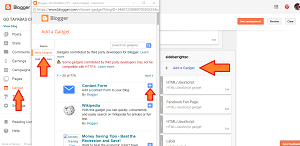
Here the CODE and Procedure to get Blog ID.

<script>
var blogId = 'BLOG ID';//this number should be mandatorily edited.
//The below message 5 Strings can also be edited
var contactFormMessageSendingMsg ='Sending...';
var contactFormMessageSentMsg = 'Your message has been sent.';
var contactFormMessageNotSentMsg = 'Message could not be sent. Please try again later.';
var contactFormEmptyMessageMsg ='Message field cannot be empty.';
var contactFormInvalidEmailMsg = 'A valid email is required.'

var widgetLoaded=false;
function sendEmailMsg() {
if(widgetLoaded== false) {
_WidgetManager._RegisterWidget('_ContactFormView', new _WidgetInfo('ContactForm1', 'sidebar', null, document.getElementById('ContactForm1'), {'contactFormMessageSendingMsg': contactFormMessageSendingMsg , 'contactFormMessageSentMsg': contactFormMessageSentMsg , 'contactFormMessageNotSentMsg': contactFormMessageNotSentMsg , 'contactFormInvalidEmailMsg': contactFormInvalidEmailMsg , 'contactFormEmptyMessageMsg': contactFormEmptyMessageMsg , 'title': 'Contact Form', 'blogId': blogId, 'contactFormNameMsg': 'Name', 'contactFormEmailMsg': 'Email', 'contactFormMessageMsg': 'Message', 'contactFormSendMsg': 'Send', 'submitUrl': 'https://www.blogger.com/contact-form.do'}, 'displayModeFull'));
widgetLoaded=true;
document.getElementById('ContactForm1_contact-form-submit').click();
}
return true;
}
</script>
<form name='contact-form'>
<div>Your Name : </div>
<input class='contact-form-name' id='ContactForm1_contact-form-name' name='name' size='30' type='text' value=''/>
<div>Your Email: <em>(required)</em></div>
<input class='contact-form-email' id='ContactForm1_contact-form-email' name='email' size='30' type='text' value=''/>
<div>Your Message: <em>(required)</em></div>
<textarea class='contact-form-email-message' id='ContactForm1_contact-form-email-message' name='email-message' rows='5'></textarea>
<p></p>
<input class='contact-form-button contact-form-button-submit' id='ContactForm1_contact-form-submit' type='button' value='Send' onclick="sendEmailMsg()"/>
<div style='text-align: center; max-width: 450px; width: 100%'>
<p class='contact-form-error-message' id='ContactForm1_contact-form-error-message'></p>
<p class='contact-form-success-message' id='ContactForm1_contact-form-success-message'></p>
</div>
</form>
Now we have a Contact form, try it if working?

 Richard N. Cabile
No comments:
Post a Comment